How to set up a local host in Dreamweaver on windows
This W3information guide you to get information about how to set up a local host in Dreamweaver.
Localhost
Localhost is a hostname that means this computer in computer networking. To access network services, Localhost can be used. These services running on me host through look back network interface. Using the loopback interface, network services provide route on any local network interface hardware.
Dreamweaver is a web development tool and developed by Adobe Systems. It is first created by Macromedia in 1997. Dreamweaver helps to create websites for the internet or intranet.
Localhost server setup used to test your files, when developing your site's locally using PHP. PHP is an open-source general-purpose scripting language, which is used for web development and can be embedded into HTML. You need to follow some steps to set up a localhost in Dreamweaver on Windows.
Install a PHP development environment
First, need to install a PHP development environment. XAMPP is helping for PHP development environment installation. Click here to download XAMPP.
Create a PHP file:
Step 1: To create a PHP file first need to install XAMPP. Then open Dreamweaver and click on ’file’ in the top menu and then choose a new option.
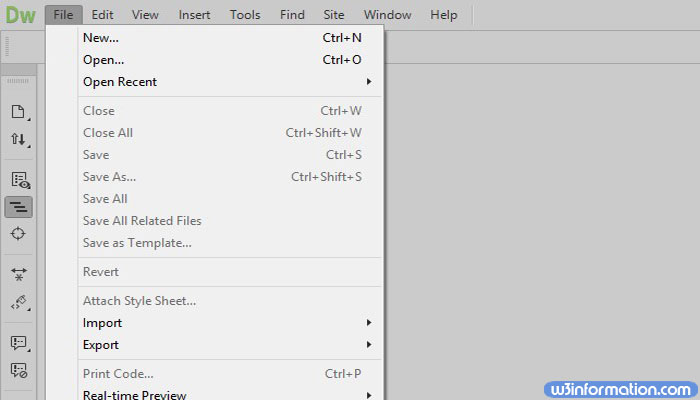
Step 2: Then select 'new document' and then select 'PHP', then click on the 'create' button.

Setup your localhost:
Step 1: Firstly one popup window will appear and it will ask a message as 'to preview pages containing server-side code, you need to specify a testing server. Would you like to specify one now?' then click on 'yes'.

Step 2: If the popup window has not appeared on screen then follow the below steps.
Step 3: In the top menu, click on 'site' then the drop-down menu will appear, in that select 'new site...'

Step 4: Next, one window will appear. That window will show the site setup for the localhost site.

Step 5: Under 'site name' enter the name of your website. And for the local site folder, click on the folder icon and choose the desired root folder.
Step 6: Now you need to create and choose your root folder. Locate and open the XAMPP drive folder and then open the 'htdocs' folder. Then create a folder name under htdocs. Enter folder name same as website name, and then install a XAMPP drive.

Step 7: Now click on the 'new root folder' and then click the 'select folder' button. Now the site name and local site folder will appear in the window. There click on 'servers' at the top left of the site setup window.

In the Next window, one '+' button will appear, click on that '+' button to add a new server.
Step 8: In the next window, select the 'basic' option which is at the top of the server’s window.

Step 9: For 'server name' enter your root folder name and for 'connect using' select ' local/network' from the dropdown list.
Step 10: For 'web URL' type ' http://localhost/' followed by name of your root folder and then click on the 'save' button.

Step 11: Then you will taken back to the 'site setup' window, where you must be checked 'testing' and then click on the 'save' button.

Step 12: Exit from Dreamweaver and go to XAMPP installed folder and double-click on the 'XAMPP-control' to open the XAMPP control panel.

Step 13: In the next window, click on 'start' buttons of 'Apache' and 'MySQL'.

Step 14: Now go back to Dreamweaver and then save your file as 'index.php' inside your root folder. Then the home page is ready to open to build on your localhost server.

 How to change a file extension
 How to restart or shutdown another computer using CMD
 How to make a zip file
 How to open XML file
 How to convert XML to Excel